 |
| Stack Dado |
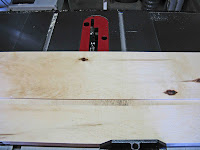
In order to accommodate the dado set, I have installed a different throat plate (shown in red) on the saw. The wider opening offers more than enough clearance for the 1/2" dado set. In fact, it would have been better to make a zero-clearance throat plate here to avoid splintering the wood, but I was in too much of a hurry at this point to be done. As we will see, this created extra work later on.
Note that the riving knife has been removed for this operation as it cannot be used for dadoing. The small oval hole in the upper left corner of the throat plate provides finger access to the catch that holds the knife in place, so it is easily removed. Use of the stack dado set is inherently dangerous, susceptible to kickback because the blade is buried in the work, and it essential to keep track of where your hands are in relation to the blade at all times. It is especially important to keep in mind the exact spot where the blade will emerge from under the work as the cut is completed.
 |
| Making the Cut |
 |
| A Nasty Cut Indeed |
Although the poor quality of the cut offends my aesthetic sensibilities, it in no way affects the functionality of what is, after all, a jig. I will repair the damage with filler to prevent further splintering and to protect myself from splinters. I will then seal the base with a couple of coats of thinned shellac for protection and to make it slide smoothly across the saw table. In my next entry, I plan to show how to fabricate wooden hold-downs for the jig and install the T-track, hopefully concluding this project.
More to come...
No comments:
Post a Comment